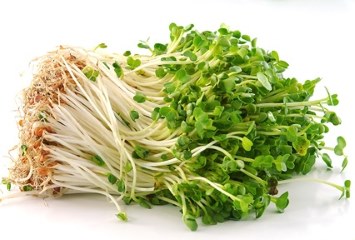
Learning how to make bean sprouts is something I have wanted to do for a long while.
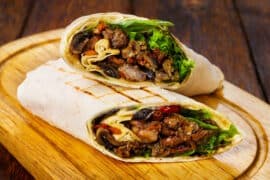
Sprouts are a staple of Chinese cooking of course and I love them in a stir-fry. They are also wonderful salad and sandwich toppers.
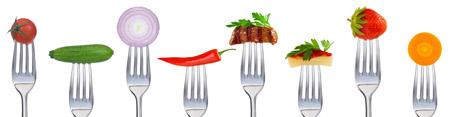
Grain and bean sprouts are also extremely healthy for us. Sprouting beans and grains activates healthy enzymes and makes the vitamins and minerals more readily available to the body, so sprouts are a great addition to our diets on a regular basis.
 Sprouts are a fantastic addition to diabetic recipes and diabetic diets. They add amazing nutritional benefits with very few calories. They are also very low in carbs and low on the glycemic index. I have found sprouts and wonderful addition to my diabetic diet.
So here we go. First of all you need to get some grains or seeds. PLEASE make sure they are non-GMO (not genetically modified) and not treated with any chemicals. We’re wanting healthy food, not toxic food.
If you can’t find the seeds locally, Amazon is a great source for both the seeds and the small bit of equipment you will need. There are other sources for seeds and equipment if you really want to get into sprouting, but the selection available at Amazon is pretty good.
Okay, let’s get sprouting! You won’t need much in the way of equipment to grow bean sprouts. You just need a jar (or tray, but most people seem to use the jar method). A widemouth glass jar is suitable for sprouting. I used a glass canning jar (Ball or Mason jar) and it is perfect for the job. The jar needs to have a screen top. The screen top allows you to rinse the sprouts daily but also allows air movement. This is what I used:

![]()
If you already have the glass canning jars at home, you just need the screened lids, like these:

![]()
How to Make Bean Sprouts
First of all you have to choose what kind of sprouts you want to grow. Mung bean sprouts are the ones we eat in stir fries and other Chinese food recipes. Alfalfa sprouts are often used in sandwiches and salads. You will see more ideas in the sprouting table below.
Okay, you have your non-GMO seeds ready. First of all, it is important that the grains, beans, or seeds be thoroughly rinsed and cleaned.
You only need a bit of seed to get started. A tablespoon of seed is enough for one jar. It is important to not crowd the sprouts in the jar. Adding too many seeds to the jar can cause your sprouts to get moldy.
Place your rinsed seed (it doesn’t have to be dried after rinsing) in the jar and cover it with some water. In just 12 hours or so you will notice your seeds begin to sprout.
You need to rinse the sprouts twice a day after they have begun to sprout. Place a piece of cheesecloth or nylon netting over the mouth of your jar and secure it with a rubber band. This is where the mesh lid works perfectly. It screws on so there is no messy spilling as you rinse your sprouts. Just invert the jar to get rid of the water, rinse the sprouts well with warm water (not hot, just lukewarm) and drain the water off. Leave the jar tilted with the mouth down.
You don’t need to concern yourself about room temperature or special lighting. Regular room temperature and indirect light works fine.
Rinse and drain the sprouts each morning and evening, more often if the humidity in your area is extremely low.
After the sprouts have reached the desired length (see the chart below), place the jar in direct sunlight for a few hours to develop chlorophyll and then rinse them with cold water. Drain the sprouts well and store, tightly covered, in the refrigerator.
Eat the sprouts as soon as possible, preferably within two or three days. If you love them, and I am sure you will, you can start a new batch again immediately. Just make sure the jar is thoroughly cleaned before you reuse it. Here is a list of the sprouting times and the optimum length of sprout in inches for each of the seeds most often used:
Sprouting Chart
| Seeds | Sprouting Days | Opt Length of Sprout |
| Mung beans | 3 to 4 | 1 to 1 1/2 inches |
| Alfalfa | 4 to 5 | 1 to 2 inches |
| Garbanzo beans | 3 to 4 | 3/4 inch to 1 inch |
| Lentils | 2 to 3 | length of the seed |
| Rye | 2 | length of the seed |
| Wheat | 2 | length of the seed |
| Soybeans* | 3 to 4 | 1/2 to 3/4 inch |
*Please note that while most of the seeds listed above are very easy to sprout correctly, soybeans can become moldy quite easily. It is essential to rinse them very thoroughly and drain them well each time.
Now you have wonderful fresh sprouts to add to salads, soups, casseroles, sandwiches or to munch on just as a snack. They can be cooked with vegetables or eggs or ground and used in sprouted bread recipes. Alfalfa sprouts are great in salads and sandwiches.
The heavier bean sprouts are really tasty when sautéed with onions and other vegetables. Soy bean sprouts and garbanzo sprouts are best cooked as they are larger and tougher.
Your home grown sprouts will improve the nutrition of any meal.
Sprouting is also a great activity for children. Kids love to see something grow, and bean sprouts almost grow before their eyes.
Once you know how to make bean sprouts you will want to try lots of bean sprout recipes. You will find an easy one here. For more, simply input bean sprouts into the search box at the top of the page.
It’s also wonderful for them to see how their food is grown. If you want to have a look at some sprouting books, with even more directions and great recipes, click on any of the images below to have a look at the book.
|
|
|
|


![]() Subscribe to the site here (it’s Free!) and never miss a great recipe.
Subscribe to the site here (it’s Free!) and never miss a great recipe.
Disclaimer: Yes I am an Amazon.com affiliate so if you purchase something from these links I will make a tiny commission. My opinions are honest. I won’t recommend anything I wouldn’t buy myself.